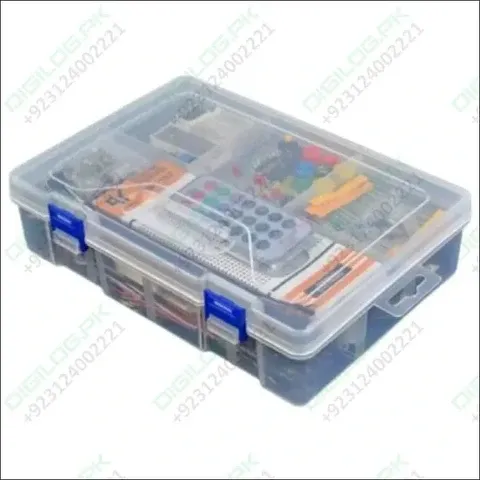
Creating a DIY remote-controlled Bluetooth speaker is a fun project that combines audio, electronics, and wireless technology. This speaker system will allow you to connect wirelessly to your devices and control playback using a remote. Here's a step-by-step guide to building your own Bluetooth speaker with remote control functionality:
Materials Needed:
- Bluetooth Audio Receiver Module: This module will receive the Bluetooth signal from your smartphone or other devices.
- Amplifier Board: A small, efficient amplifier module (like a Class D amplifier) to power the speakers.
- Speakers: A pair of small full-range speakers (3-4 inches) or a combination of a subwoofer and tweeters for better sound quality.
- Battery Pack: A rechargeable lithium-ion battery pack (7.4V or 12V) or a power bank for portability.
- Remote Control Module: An IR remote control and receiver module to control volume, play/pause, and track navigation.
- Enclosure/Box: A wooden or plastic box to house the components. You can buy a pre-made box or build one from scratch.
- Power Switch: To turn the speaker on and off.
- Micro USB Charging Module (Optional): For charging the battery pack if using lithium-ion batteries.
- Aux Input Jack (3.5mm): For wired connections to devices.
- Volume Control Knob (Optional): A potentiometer for manual volume adjustment.
- Wires and Connectors: For connecting all the components.
- Adhesive Tape/Glue, Screws, and Basic Tools: For assembly.
Steps to Build the DIY Remote-Controlled Bluetooth Speaker:
Prepare the Enclosure:
- Size and Design: Choose a box that fits all components, including the speakers, amplifier, and Bluetooth module. Wood is preferred for its acoustic properties, but plastic can also work.
- Cut Holes: Use a saw and drill to cut out holes for the speakers, control knobs, power switch, and input/output ports. Place speaker holes on the front and control knobs on the top or side for easy access.
Install the Speakers:
- Mounting: Insert the speakers into the holes cut in the front of the box. Secure them with screws or glue. Ensure they are tightly sealed to prevent air leaks.
- Subwoofer and Tweeters (Optional): If using a subwoofer and tweeters, position the subwoofer centrally and tweeters on the sides for a balanced sound.
Install the Amplifier Board:
- Mount Inside: Place the amplifier board inside the enclosure. Secure it with screws or adhesive tape.
- Connect Speakers: Wire the speakers to the amplifier output. Match the polarity (positive to positive, negative to negative) for proper sound quality.
Set Up the Bluetooth Module:
- Mount: Install the Bluetooth module inside the box, close to the amplifier for short signal paths.
- Connect to Amplifier: Connect the audio output of the Bluetooth module to the input of the amplifier. This will allow audio signals to pass through and be amplified.
- Power Supply: Power the Bluetooth module from the same battery pack as the amplifier. Most Bluetooth modules operate on 5V, so use a voltage regulator if needed.
Add the Remote Control Module:
- IR Receiver Placement: Place the IR receiver on the front of the box where it can easily receive signals from the remote control.
- Connect to Amplifier: Wire the IR receiver to the amplifier board, connecting the volume, play/pause, and track navigation controls to the appropriate pins on the amplifier.
- Program Remote Functions: Configure the remote control functions according to the amplifier and Bluetooth module's capabilities. Some modules may require specific programming.
Install the Battery Pack and Power Switch:
- Battery Pack: Secure the battery pack inside the enclosure. Connect it to the amplifier and Bluetooth module for power.
- Power Switch: Install a power switch on the side of the box. Connect it between the battery and amplifier to control the power supply.
Optional: Install a Micro USB Charging Module:
- If using lithium-ion batteries, add a charging module to allow easy recharging. Mount the charging module on the back or side of the box, ensuring it's accessible.
- Connect the charging module to the battery pack, and wire the micro USB input for charging.
Add Volume Control (Optional):
- Potentiometer: Install a volume control knob on the side or top of the box. Connect it to the amplifier board’s volume control input.
- Test: Turn the knob to adjust the volume and ensure it works smoothly.
Aux Input Jack:
- Install: Mount the 3.5mm aux input jack on the side or back of the box.
- Connect: Wire the aux input to the amplifier input for wired connections.
Assemble and Test:
- Close the Box: After all components are installed, close the box securely. Use screws and adhesive to hold everything together.
- Test the System: Turn on the power switch, pair a Bluetooth device, and use the remote to control playback. Play some music to test sound quality and remote functionality. Adjust settings as needed.
Finishing Touches:
- Decorate: Paint or decorate the enclosure for a personal touch. Add a handle or carrying strap for portability.
- Label Controls: Label the power switch, volume knob, and input ports for ease of use.
Safety Tips:
- Battery Safety: Handle lithium-ion batteries carefully. Use a battery management system (BMS) to prevent overcharging and overheating.
- Wiring: Ensure all connections are secure and insulated to prevent short circuits. Use heat shrink tubing or electrical tape on exposed wires.
- Ventilation: If using a high-power amplifier, provide adequate ventilation to prevent overheating.
Applications:
- Portable Speaker: Use your DIY Bluetooth speaker for outdoor activities, small parties, or personal listening.
- Home Audio: Place it in a room to serve as a stylish and functional audio system.
- Learning Project: Building this speaker is a great way to learn about audio electronics, Bluetooth technology, and remote control systems.
By following these steps, you can create a personalized, portable Bluetooth speaker that delivers great sound and convenient control. Enjoy your new DIY remote-controlled Bluetooth speaker!
Important links Related to Electronics


Comments
Post a Comment