Creating a DIY rechargeable solar emergency light is a practical and eco-friendly project. Here's a basic guide to help you get started. Please note that electrical work involves potential hazards, so ensure you take appropriate safety precautions, and if you're not comfortable with certain aspects, seek help from someone experienced.
Materials Needed:
Solar Panel:
- Select a solar panel with sufficient power output for charging the battery. You may need a solar charge controller if the panel voltage is higher than the battery voltage.
Rechargeable Battery:
- Choose a rechargeable battery with a voltage suitable for your LED lights. A 3.7V lithium-ion battery is a common choice.
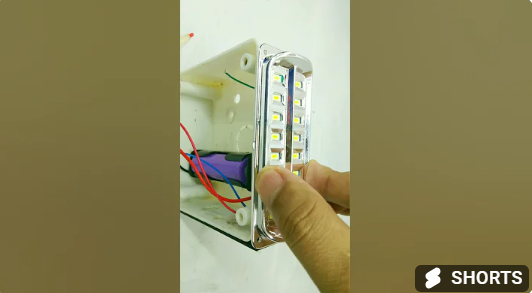
LEDs:
- Select high-brightness LEDs for illumination. Warm white LEDs are often preferred for emergency lighting.
LED Driver Circuit:
- Use a constant current LED driver to regulate the current supplied to the LEDs.
Enclosure:
- Choose a suitable enclosure for housing the components. This could be a plastic box or any other weather-resistant enclosure.
Switch:
- Include a switch for turning the light on and off.
Wires and Connectors:
- Use wires to connect the components and connectors for easy assembly and maintenance.
Resistors and Diodes:
- Depending on your specific LED and battery voltage, you may need resistors and diodes for proper circuit operation.
Battery Charger Module:
- If your battery doesn't have built-in charging circuitry, use a battery charger module suitable for your battery type.
Instructions:
Prepare the Enclosure:
- Drill holes in the enclosure for the solar panel, switch, and LEDs.
Install Solar Panel:
- Mount the solar panel on the top of the enclosure using adhesive or screws. Ensure it's positioned to receive sunlight effectively.
Install Battery:
- Place the rechargeable battery inside the enclosure. If your battery requires a charging circuit, connect it accordingly.
Connect Solar Panel and Battery:
- Connect the solar panel to the battery through the appropriate charging circuit. Use a solar charge controller if needed.
Install LEDs and Driver Circuit:
- Mount the LEDs inside the enclosure and connect them to the LED driver circuit. Ensure proper polarity.
Connect Switch:
- Connect the switch to control the power supply to the LEDs.
Wire Everything Together:
- Connect the solar panel, battery, LEDs, switch, and any other components using wires. Double-check all connections for accuracy.
Test the Circuit:
- Test the circuit to ensure that the LEDs light up when the switch is turned on and that the solar panel charges the battery.
Close and Seal the Enclosure:
- Seal the enclosure to protect the components from weather conditions.
Place in Sunlight:
- Place the solar emergency light in direct sunlight to charge the battery. Ensure the solar panel receives sunlight for efficient charging.
Use in Emergencies:
- Your DIY rechargeable solar emergency light is ready to use. It can be a valuable tool during power outages or emergencies.
- Remember to take safety precautions, use appropriate components, and tailor the instructions based on the specific components you choose for your project.
Comments
Post a Comment